
I recently bought a Novation Zero SLMkII as a means to downsize my live rig while providing the same, if not superior functionality as my current set up. It’s got a nice variety of drum pads, backlit toggle buttons, a crossfader, pots, rotary encoders and up-faders, as well as a plethora of MIDI ins and outs, sustain and expression pedal inputs, and a customisable LCD screen that dynamically updates according to which surface you just interacted with. Nifty… but not perfect.
My biggest gripe was with the faders. Apart from being kind of cheap and flimsy, the low-profile, concave design was completely inappropriate for quick up and down swipes of the faders, which is something I do often. I could see myself missing or losing my grip on them in a heated live scenario. Ideally, I’d have bought a set of those tasty looking Chroma Caps from DJ Tech Tools, but the problem is that the actual faders of the SL are too far recessed beneath the facade of the controller, and the stubs don’t protrude far enough for standard fader caps. I needed fader caps with long stems, and I couldn’t find anything online.
Time for a crude hack 😉
0) ASSEMBLE THY MATERIALS:

Everything you need for a quick hack.
For this exercise, we will be using (8) fader caps from a Novation Zero SLMkII, (1) rusty old saw, (1) bamboo slat salvaged from a cheap old chopping block, (1) pack “J-B Weld” liquid concrete epoxy (the stronger the better), (1) sheet medium sandpaper, (1) box-cutter retractable knife, (1) can blue spray paint, (1) pen/pencil.
1) HAND CUT YOUR FADER STUBS…
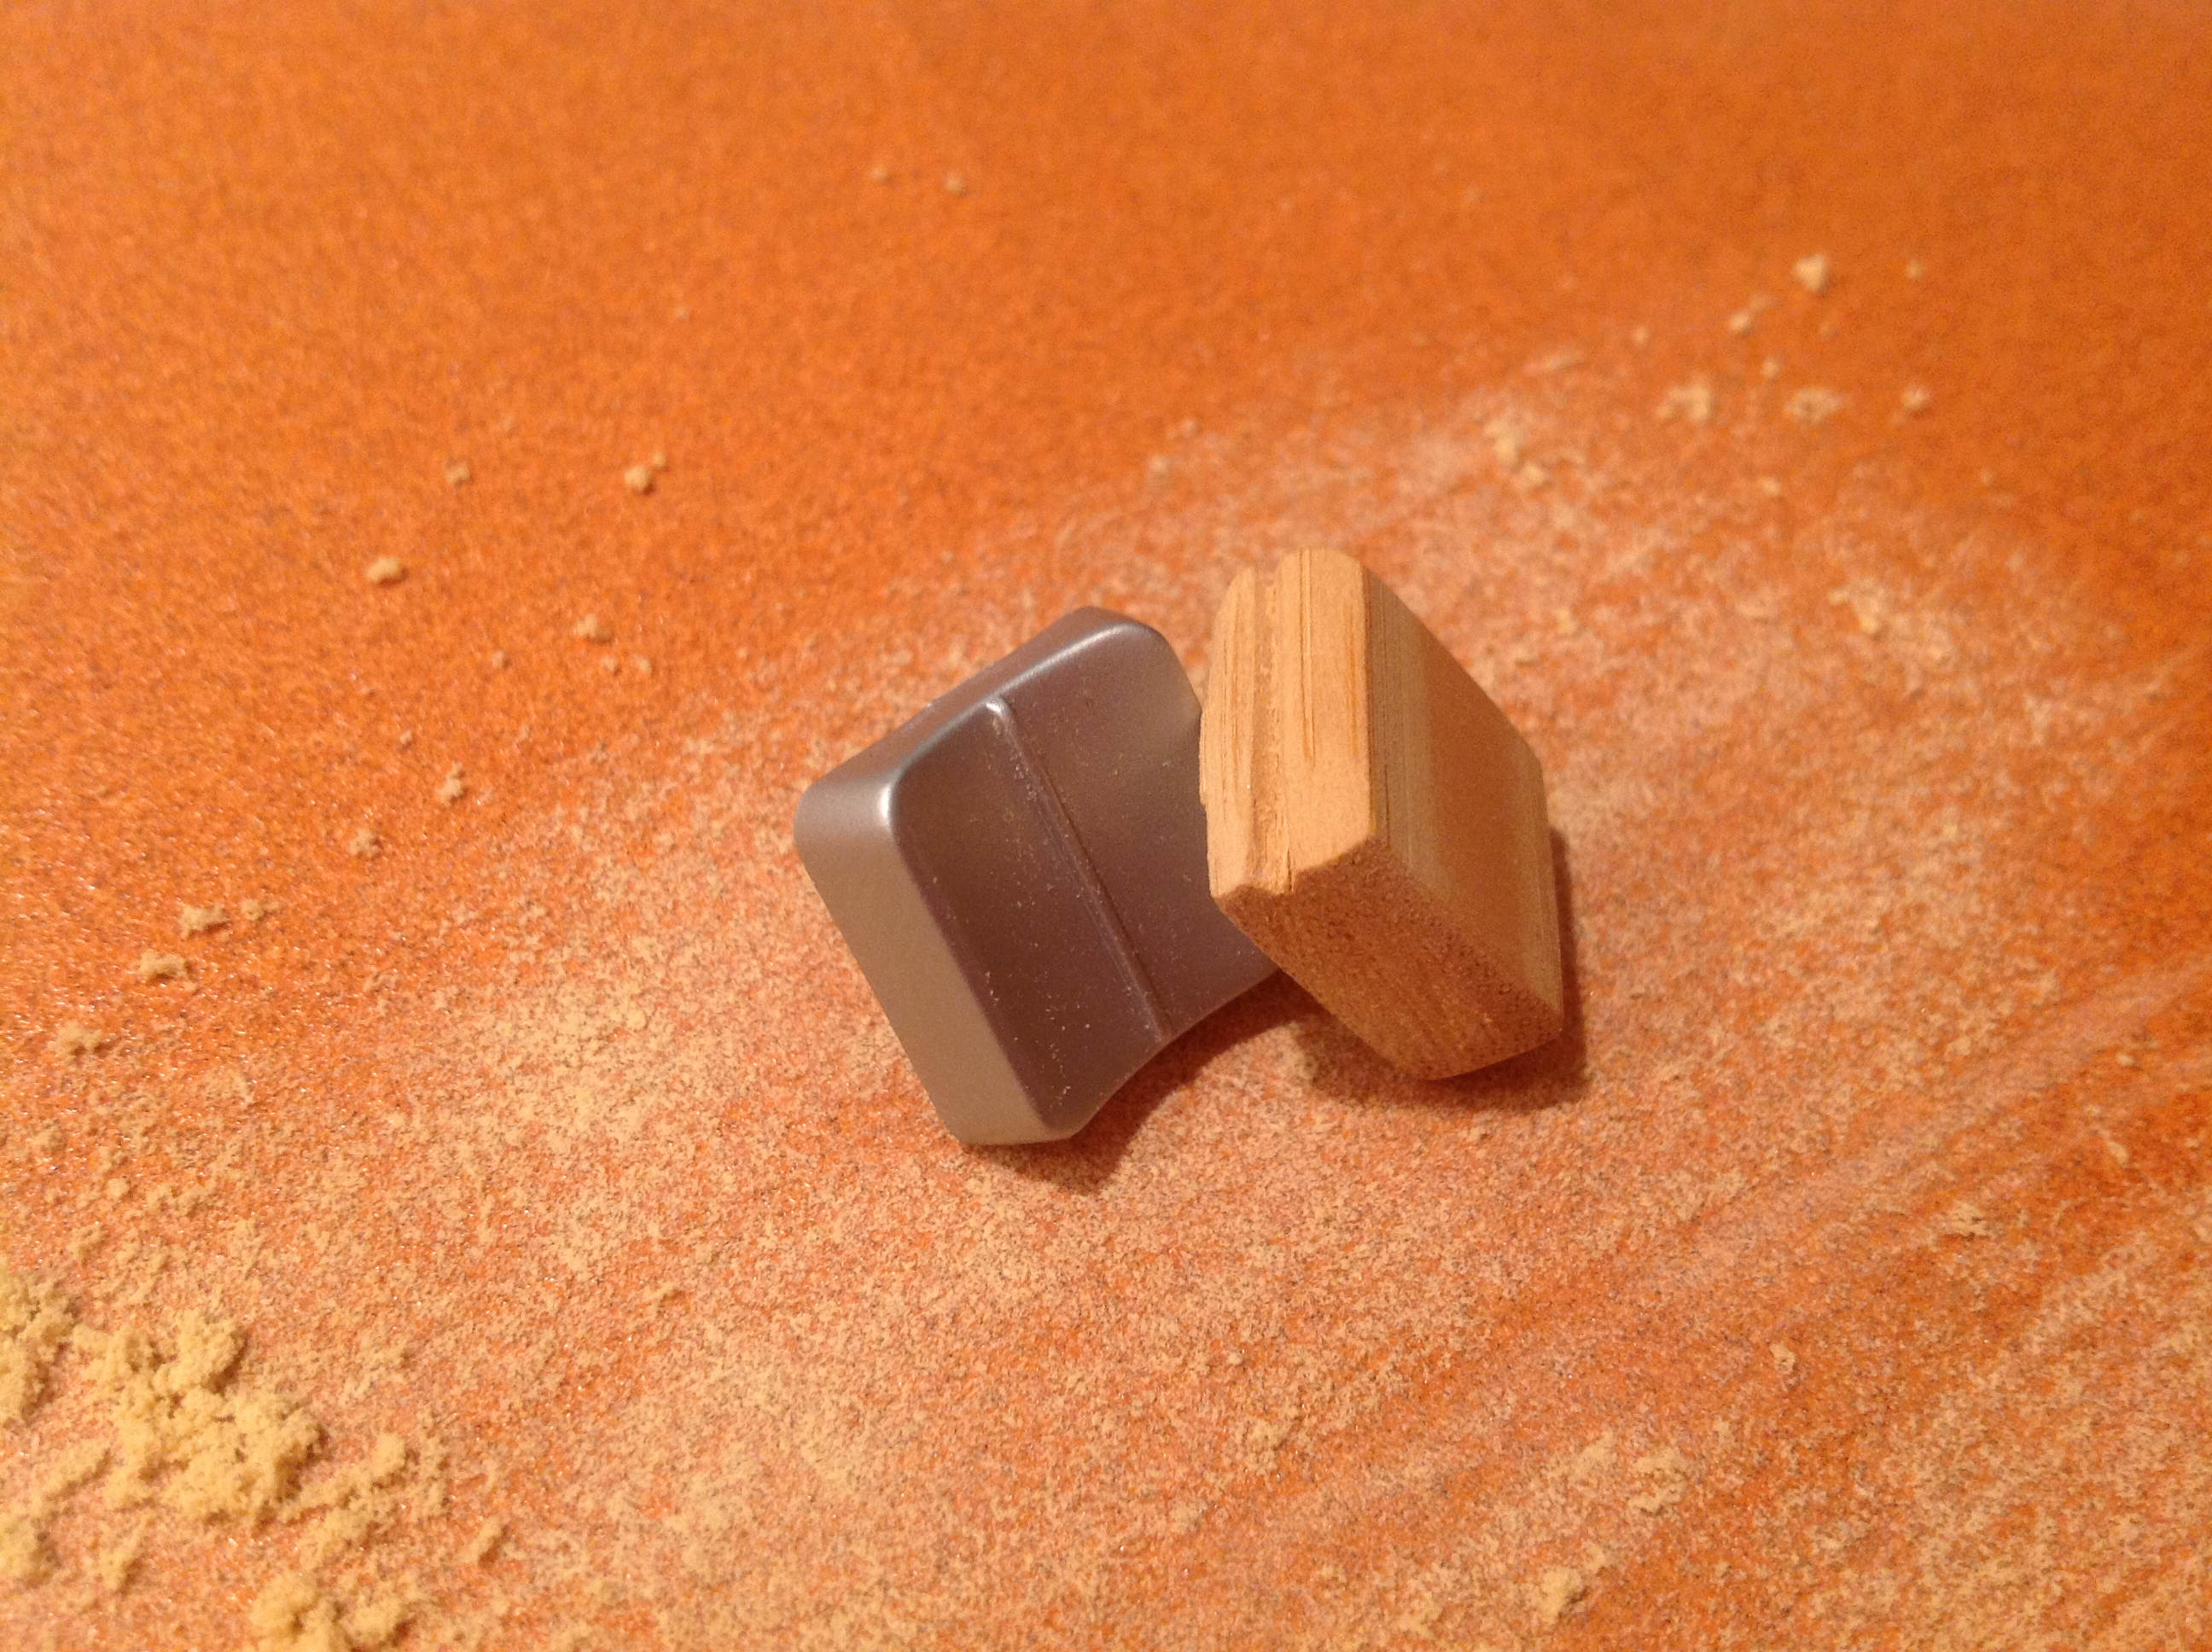
One down, seven to go.
…with the finesse and precision of a 12th century artisan. Or the cack-handedness of a 21st century douchebag, whatever. Sand the edges down and make a nice smooth, curvy surface. Note the notches I cut using the box-cutter – this was to hug the shape of those concave faders, and to give something for the epoxy to get stuck into to make a stronger bond.
2) ONCE YOU’VE PREPPED EIGHT OF THE LITTLE BASTARDS…
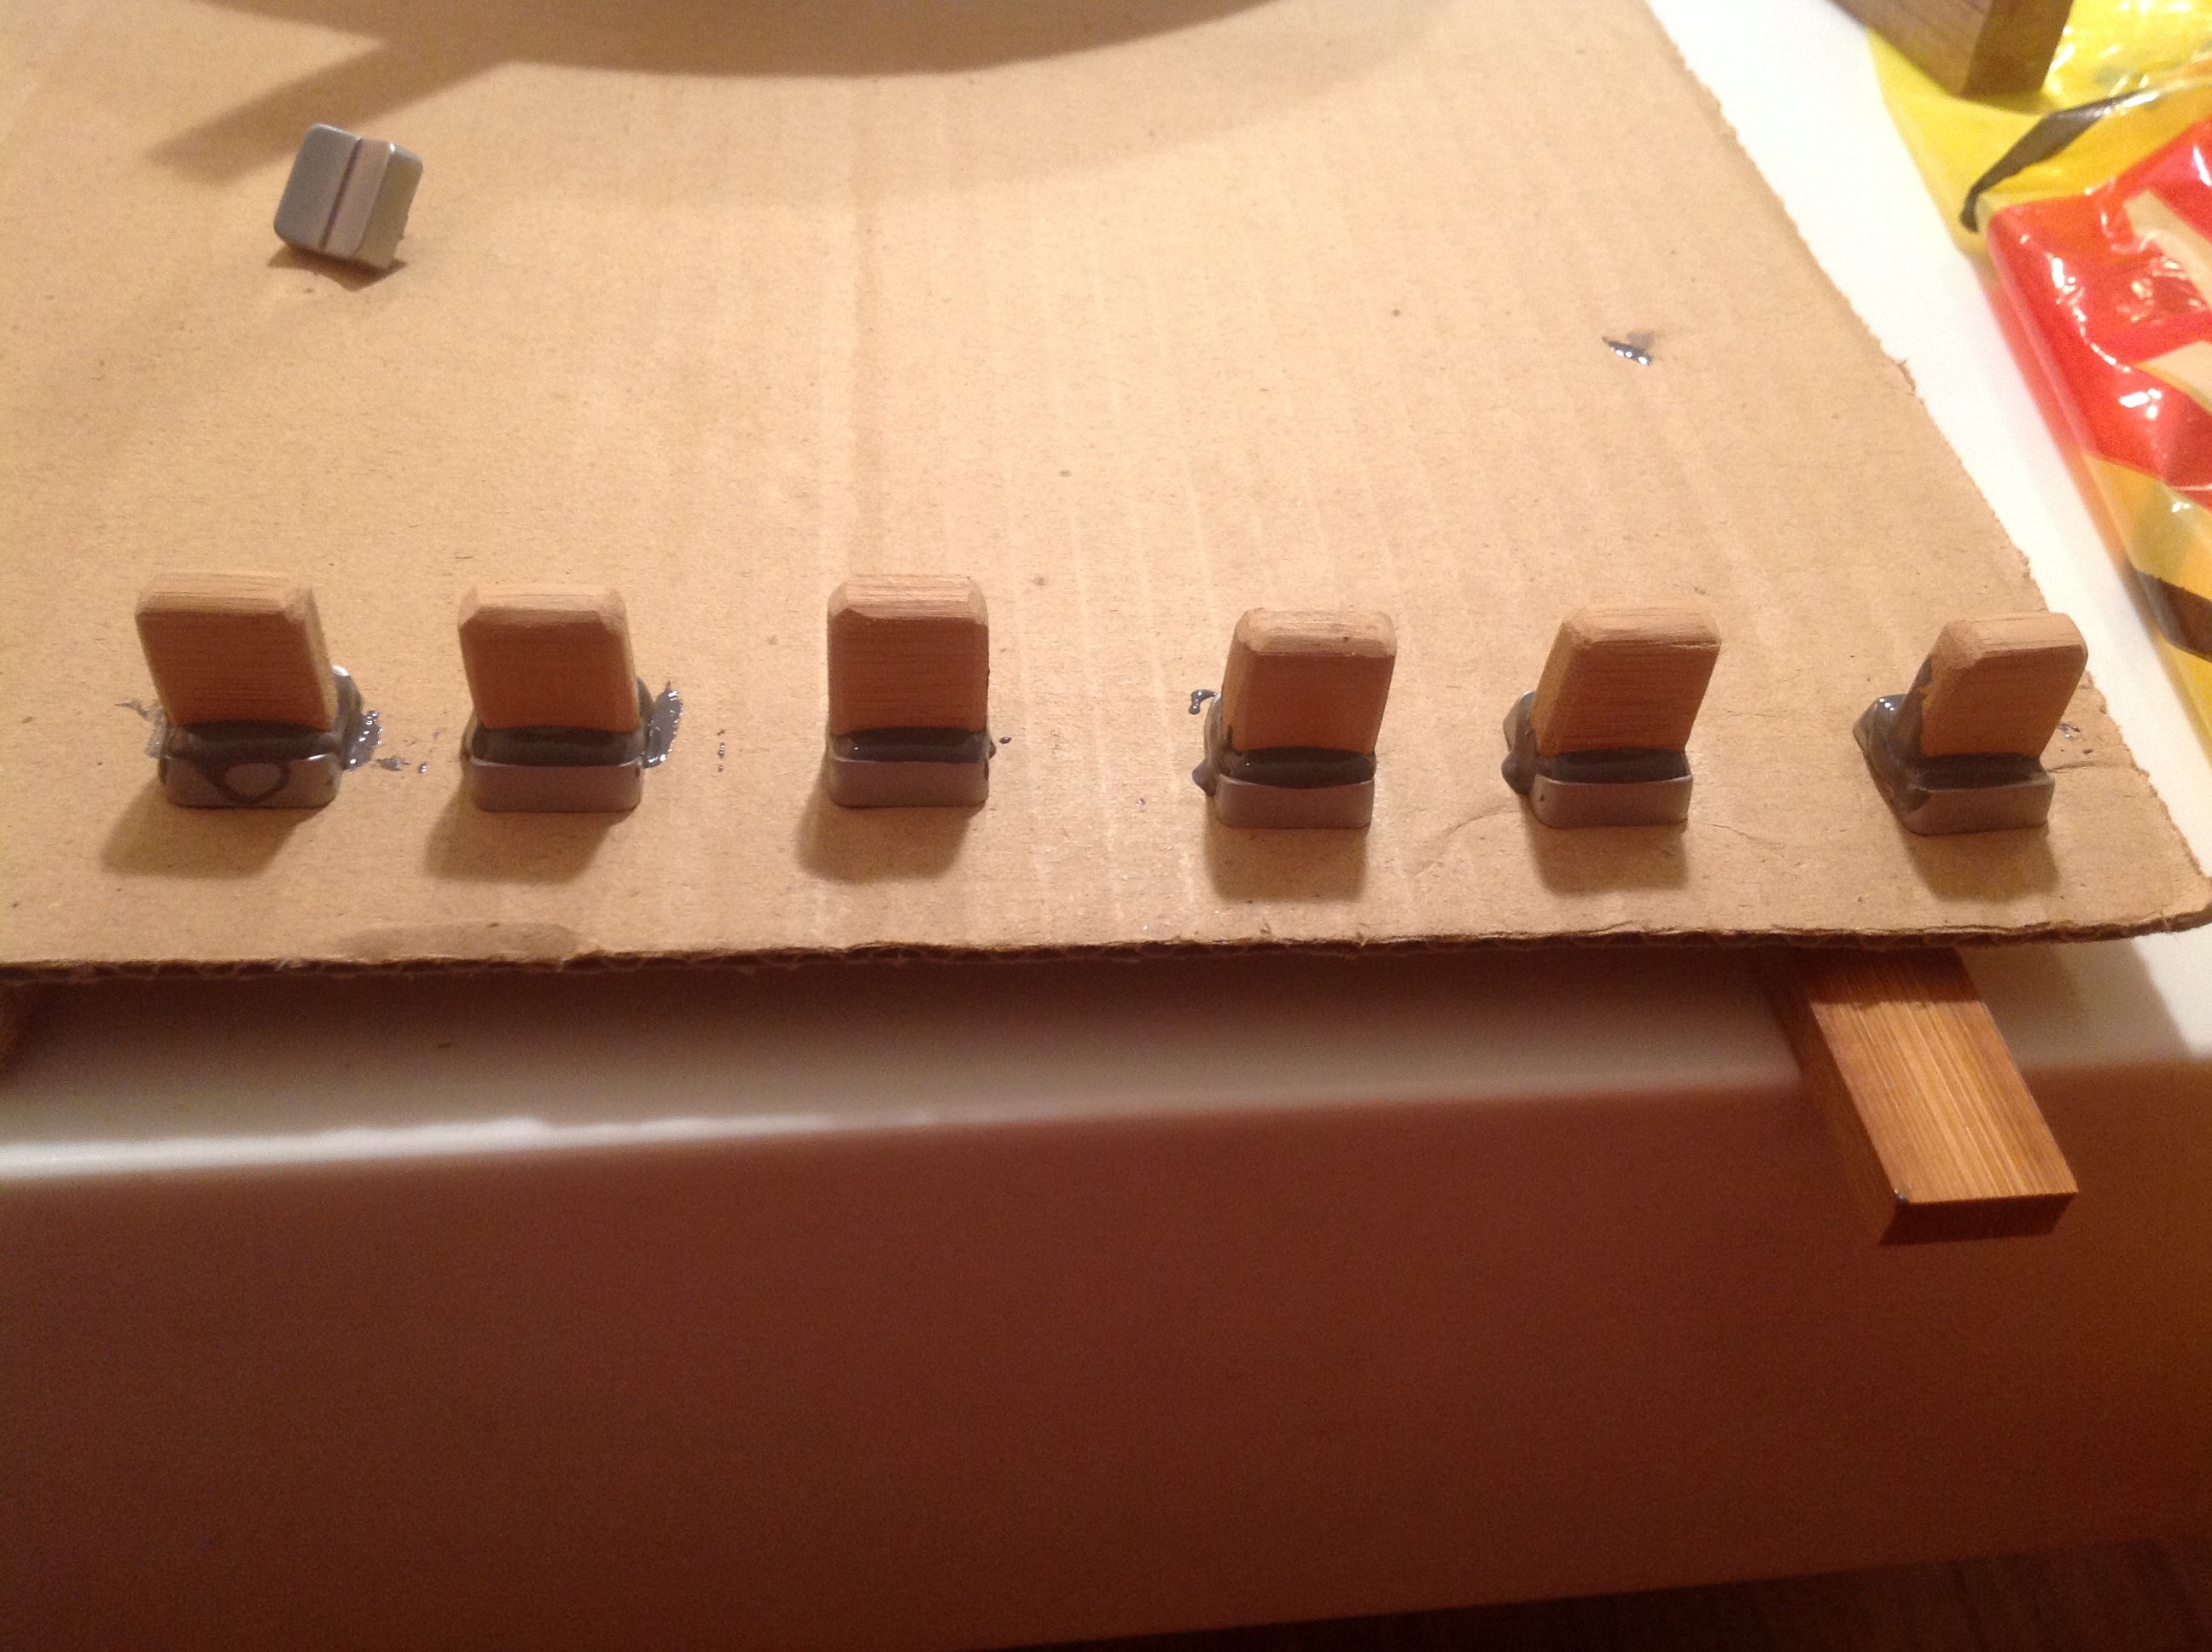
Gooey.
…it’s time to apply a healthy glob of epoxy onto the fader caps and plop them on. The notch keeps them centred and the displaced epoxy pools around the stubs – sure to make a solid bond once dry. I used a sheet of cardboard, raised it with some more bamboo slats I had lying around, and cut notches into it to allow the faders to sit horizontally upright without toppling over.
3) LEAVE TO DRY. DRINK BEER ETC, PASS OUT.
In the morning, when the epoxy is completely dried and hardened, sand off any excess goo and use your box-cutter to brutally slice off any undesirable tumours, like some sort of crazed surgeon.
4) SNEAK INTO A NEARBY PARKADE…
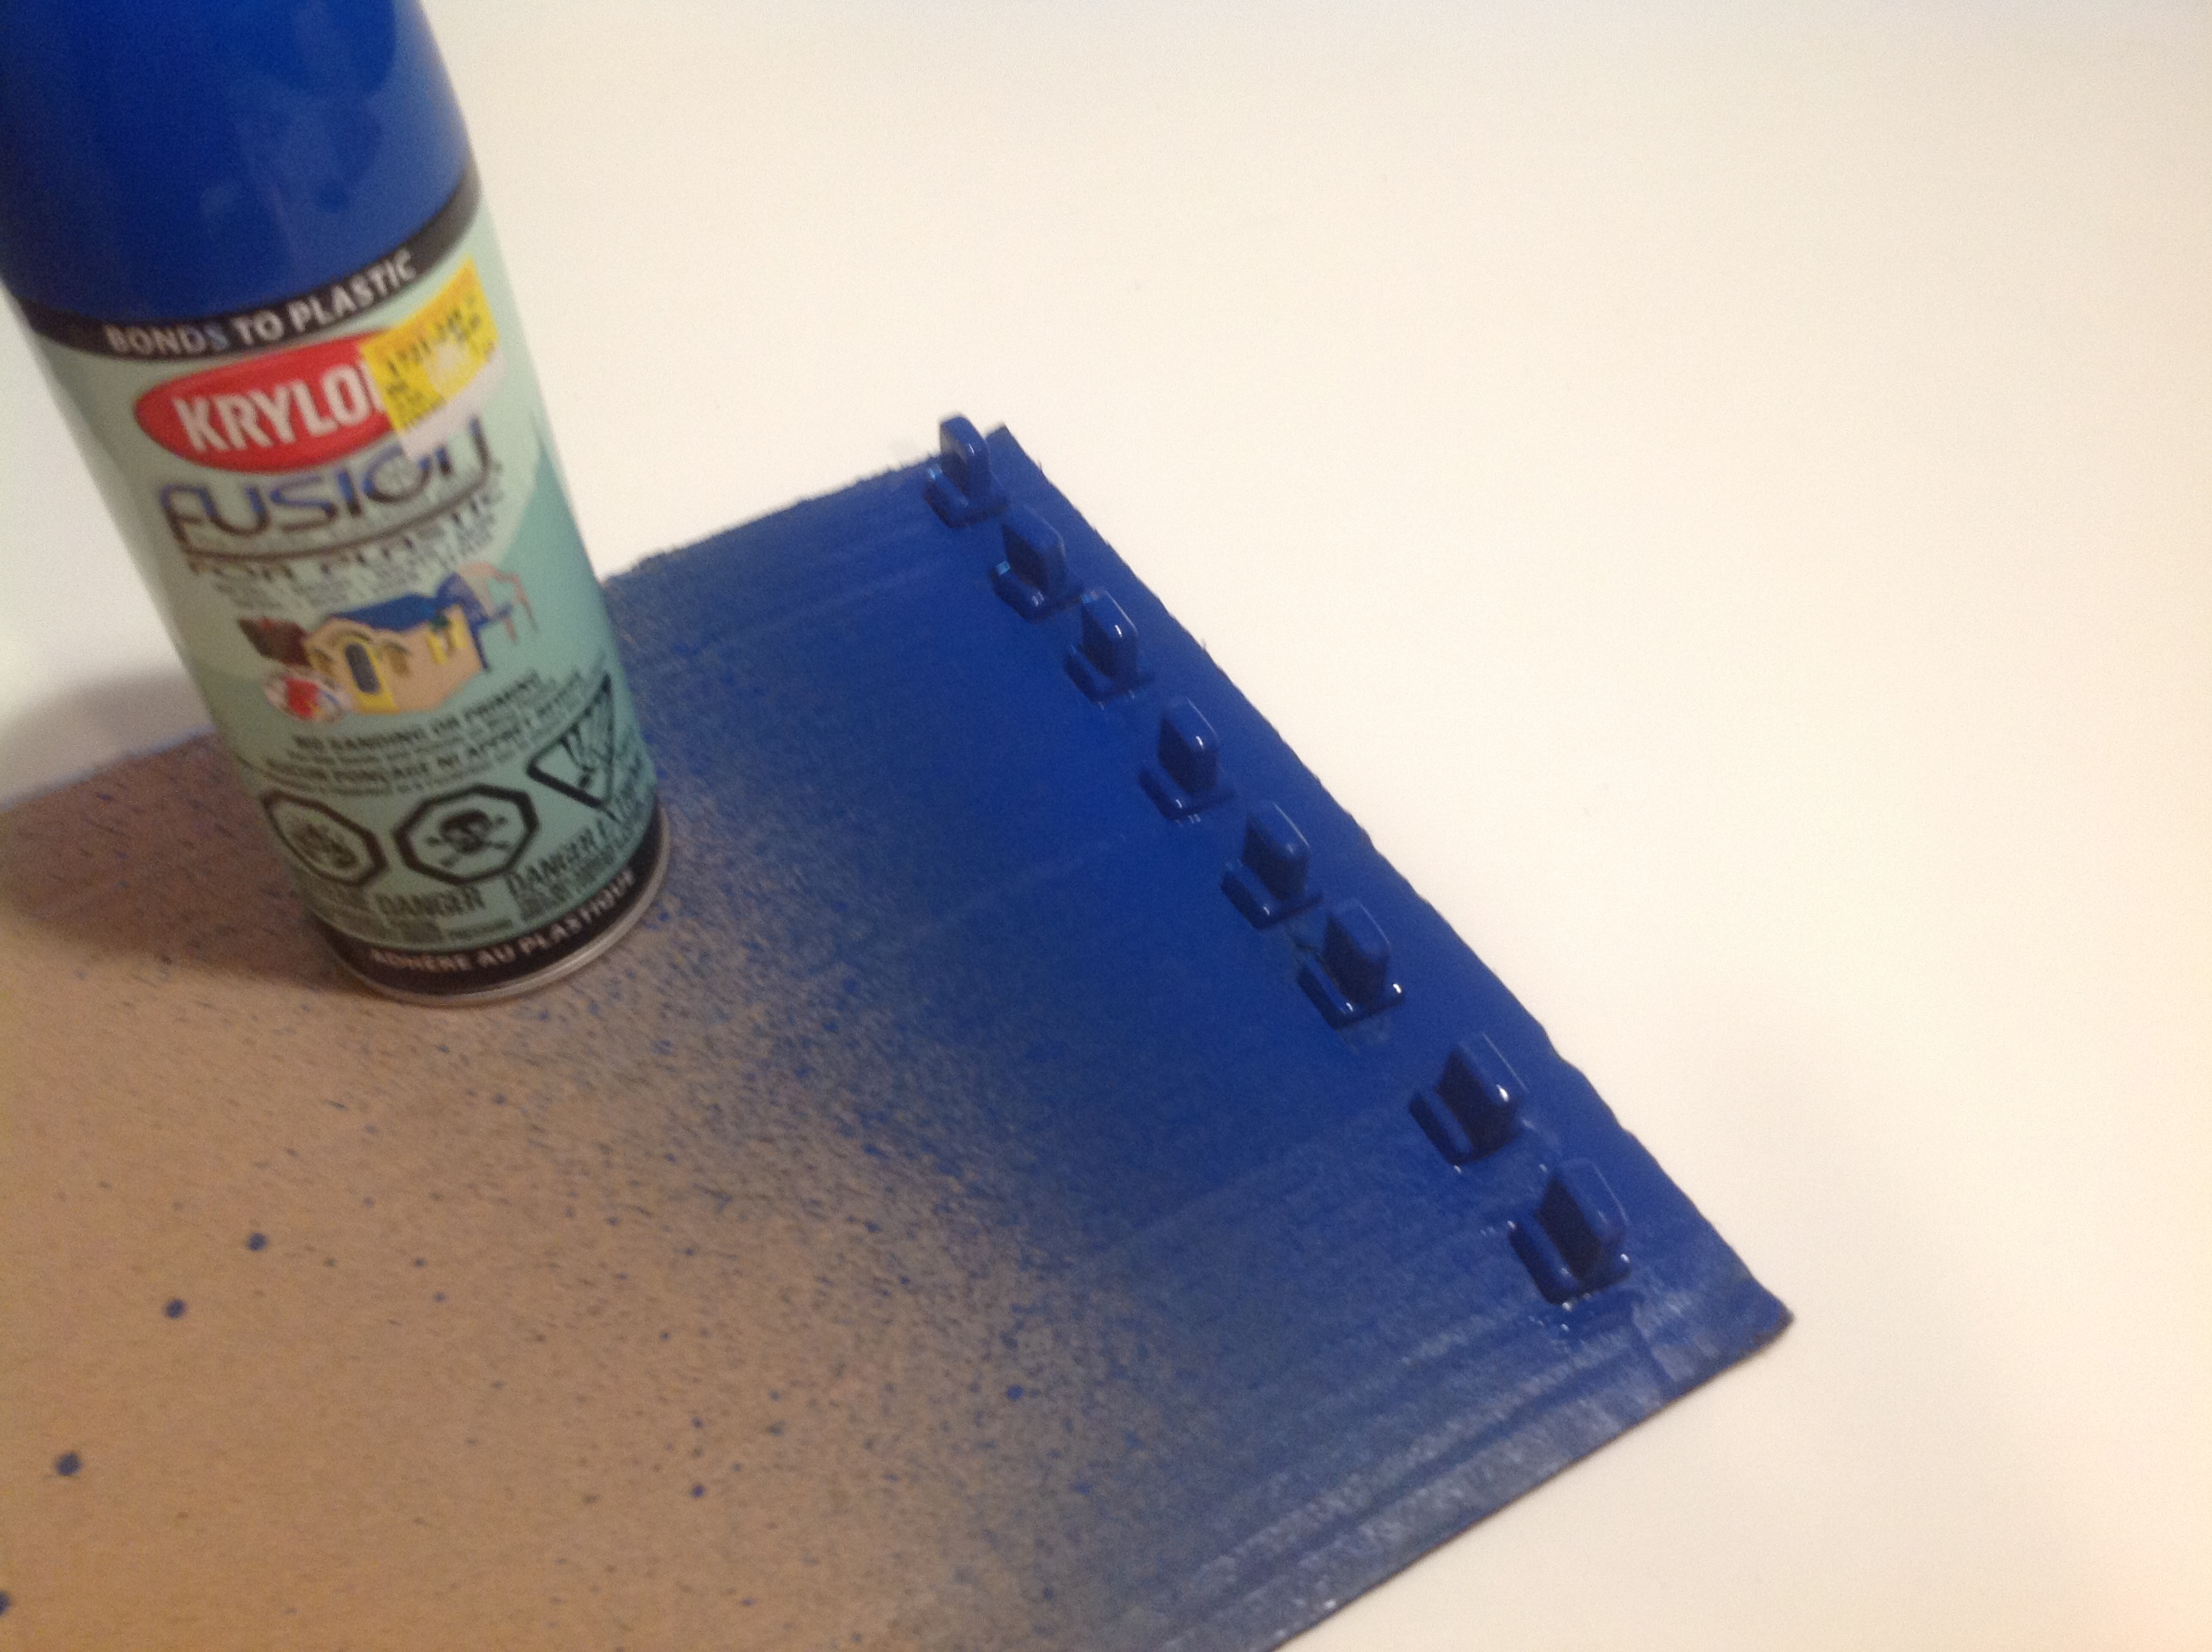
Bluey.
…place your fader-caps-in-cardboard on the concrete floor and spray liberally, leaving an artistic, rectangle-shaped stencil on the floor. Try not to get paint on hands. Sneak out unseen.
5) LEAVE OUT TO DRY…
…preferably not in an indoor enclosed space where you or any living creatures might sit and breathe.
6) PUT BACK ON NOVATION SL…
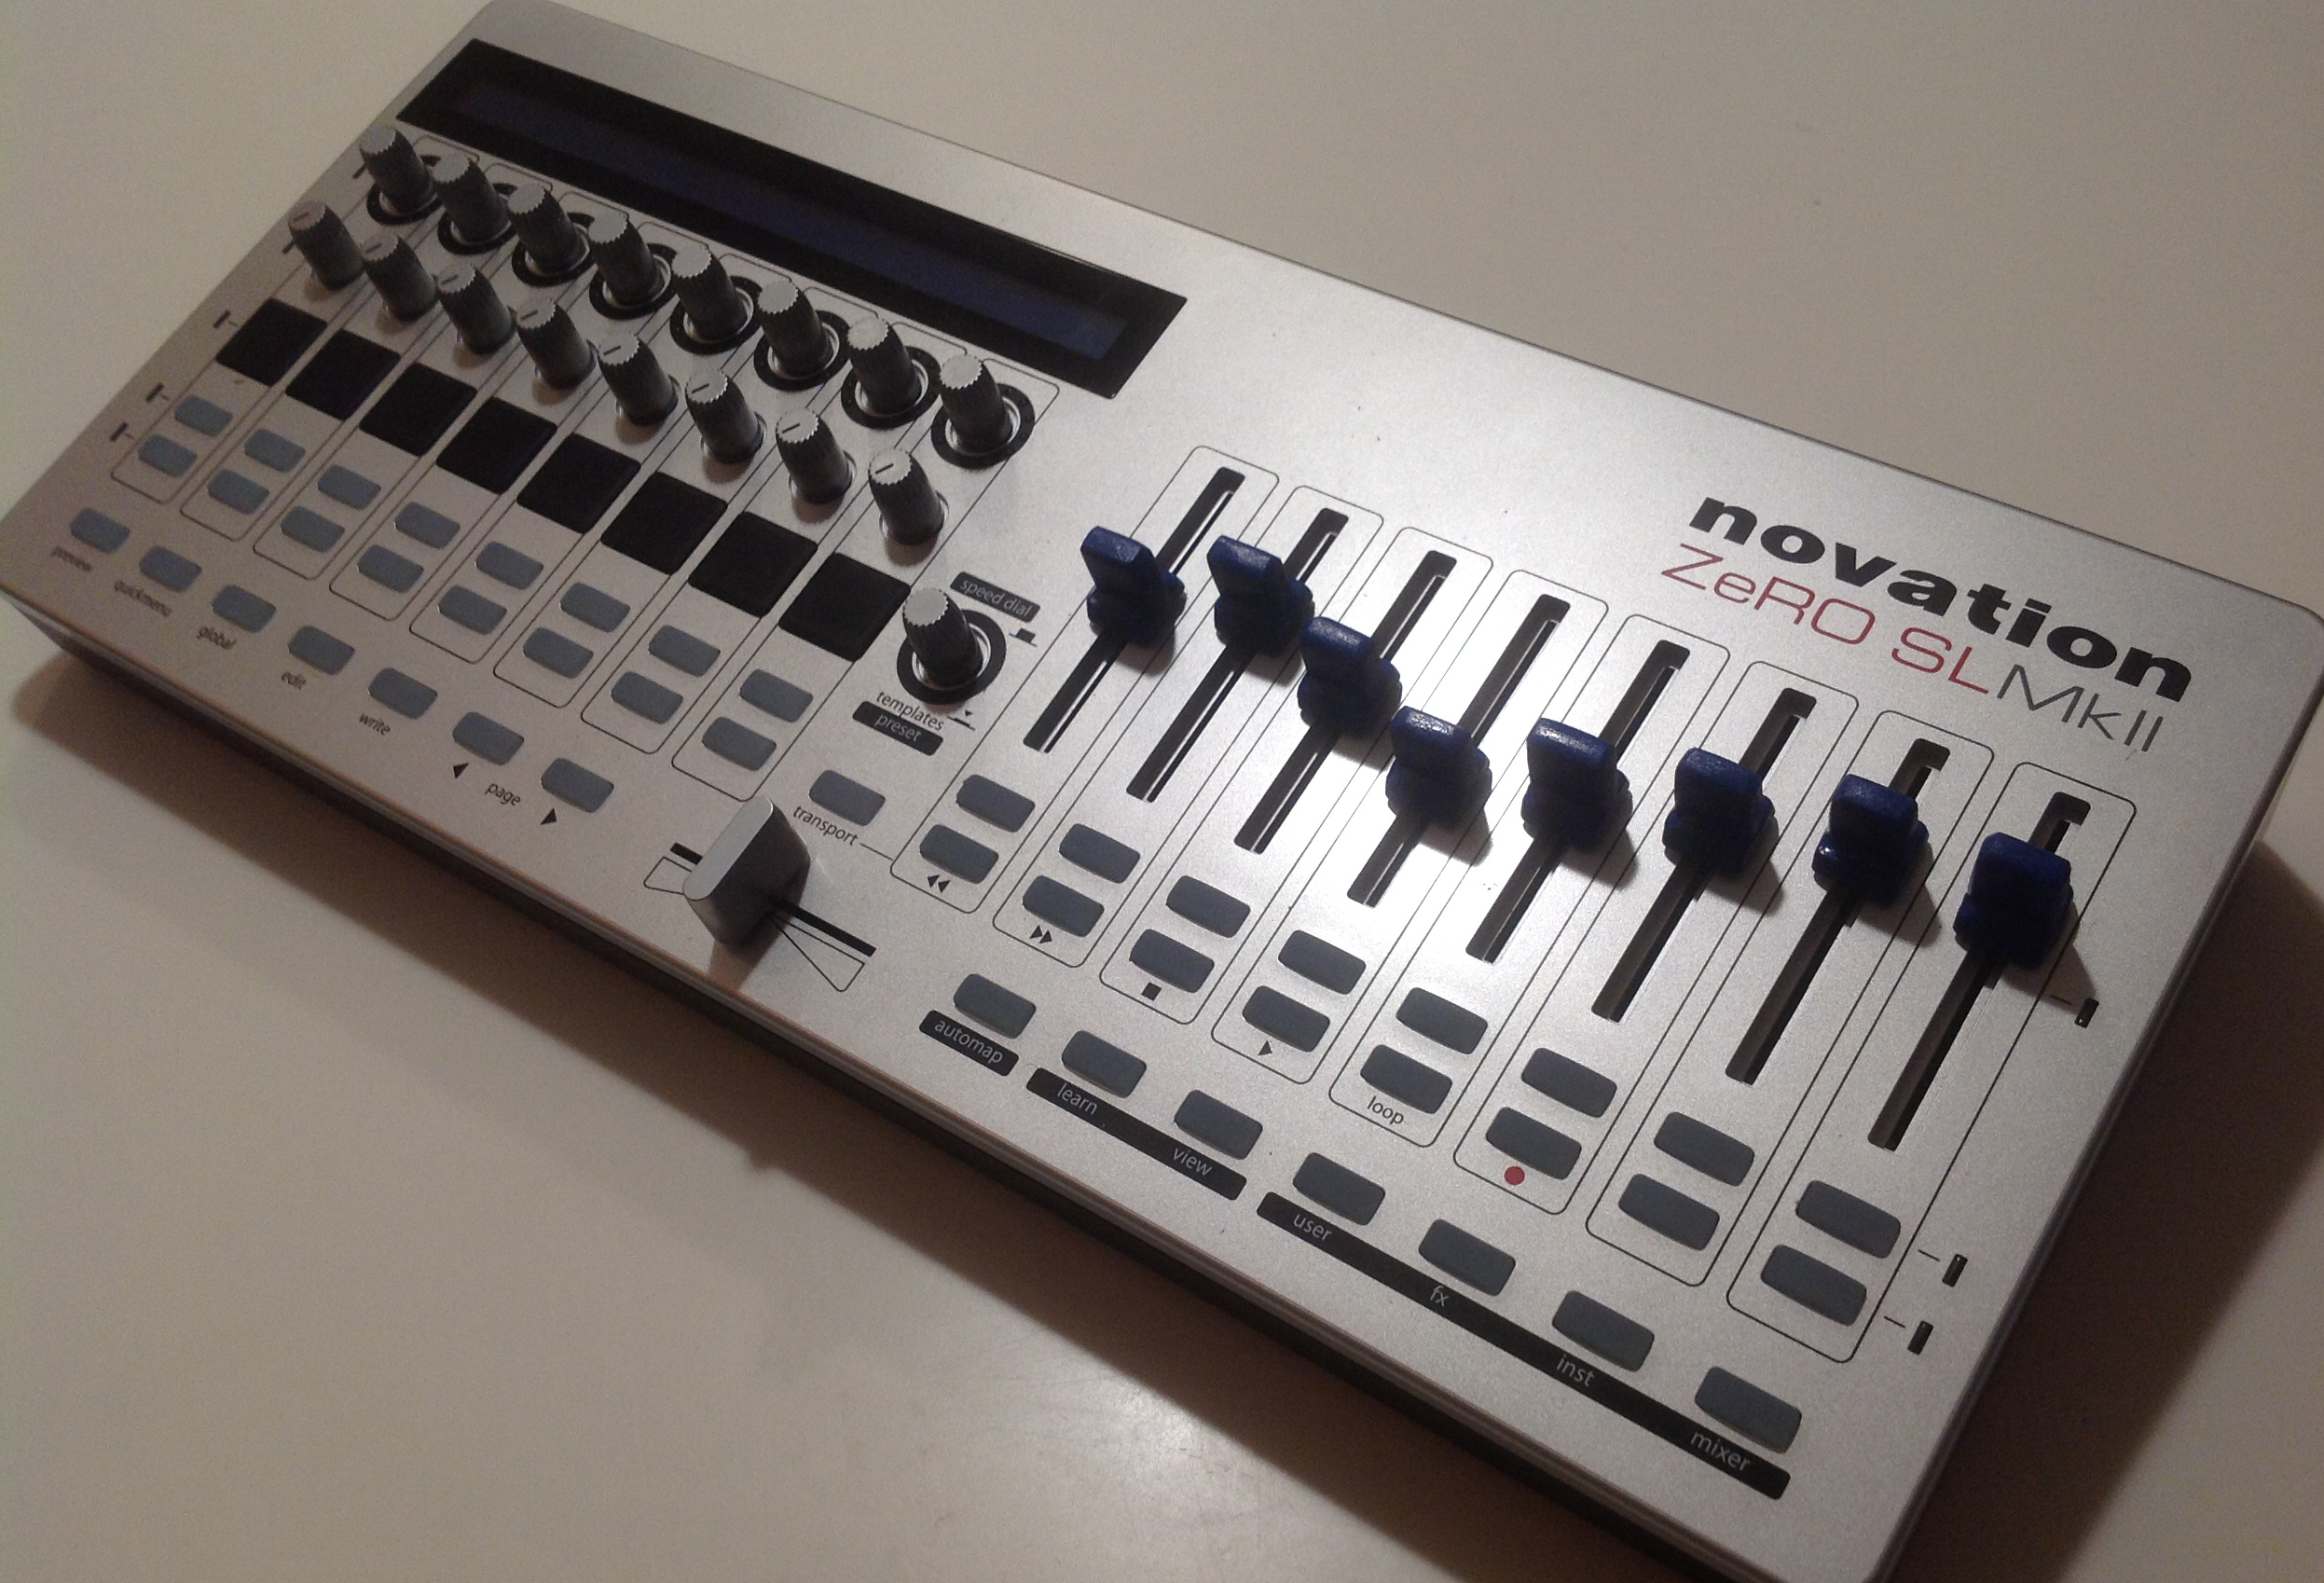
Novation Zero SLMkII with big, dumb blue faders.
…and marvel at your own handiwork.
There will be a sequel, as those drum pads are a total disgrace and need replacing before they can be used in any capacity whatsoever. Watch this space.
I can’t help but think that due to the emphatic nature of the instructions in step five that you killed someone’s hamster…
…there’s a cat in the apartment… and yeah it was touch-and-go.